How to calibrate the magnification
Task-oriented. "40×" is a claim — here you measure it, and afterwards you can give real sizes in micrometres.
What you need
- Any working microscope build (best: the smartphone microscope)
- The calibration ruler / scale target from the box
State the exact calibration target shipped in the current CoreBox (stage micrometer
with 0.1 mm divisions? printed ruler?). The archive photos show a div = 0.1
micrometer scale.
Step 1 — Photograph the scale
Put the calibration ruler in the sample holder instead of a sample, focus, and take a photo without digital zoom (zoom changes the calibration!).
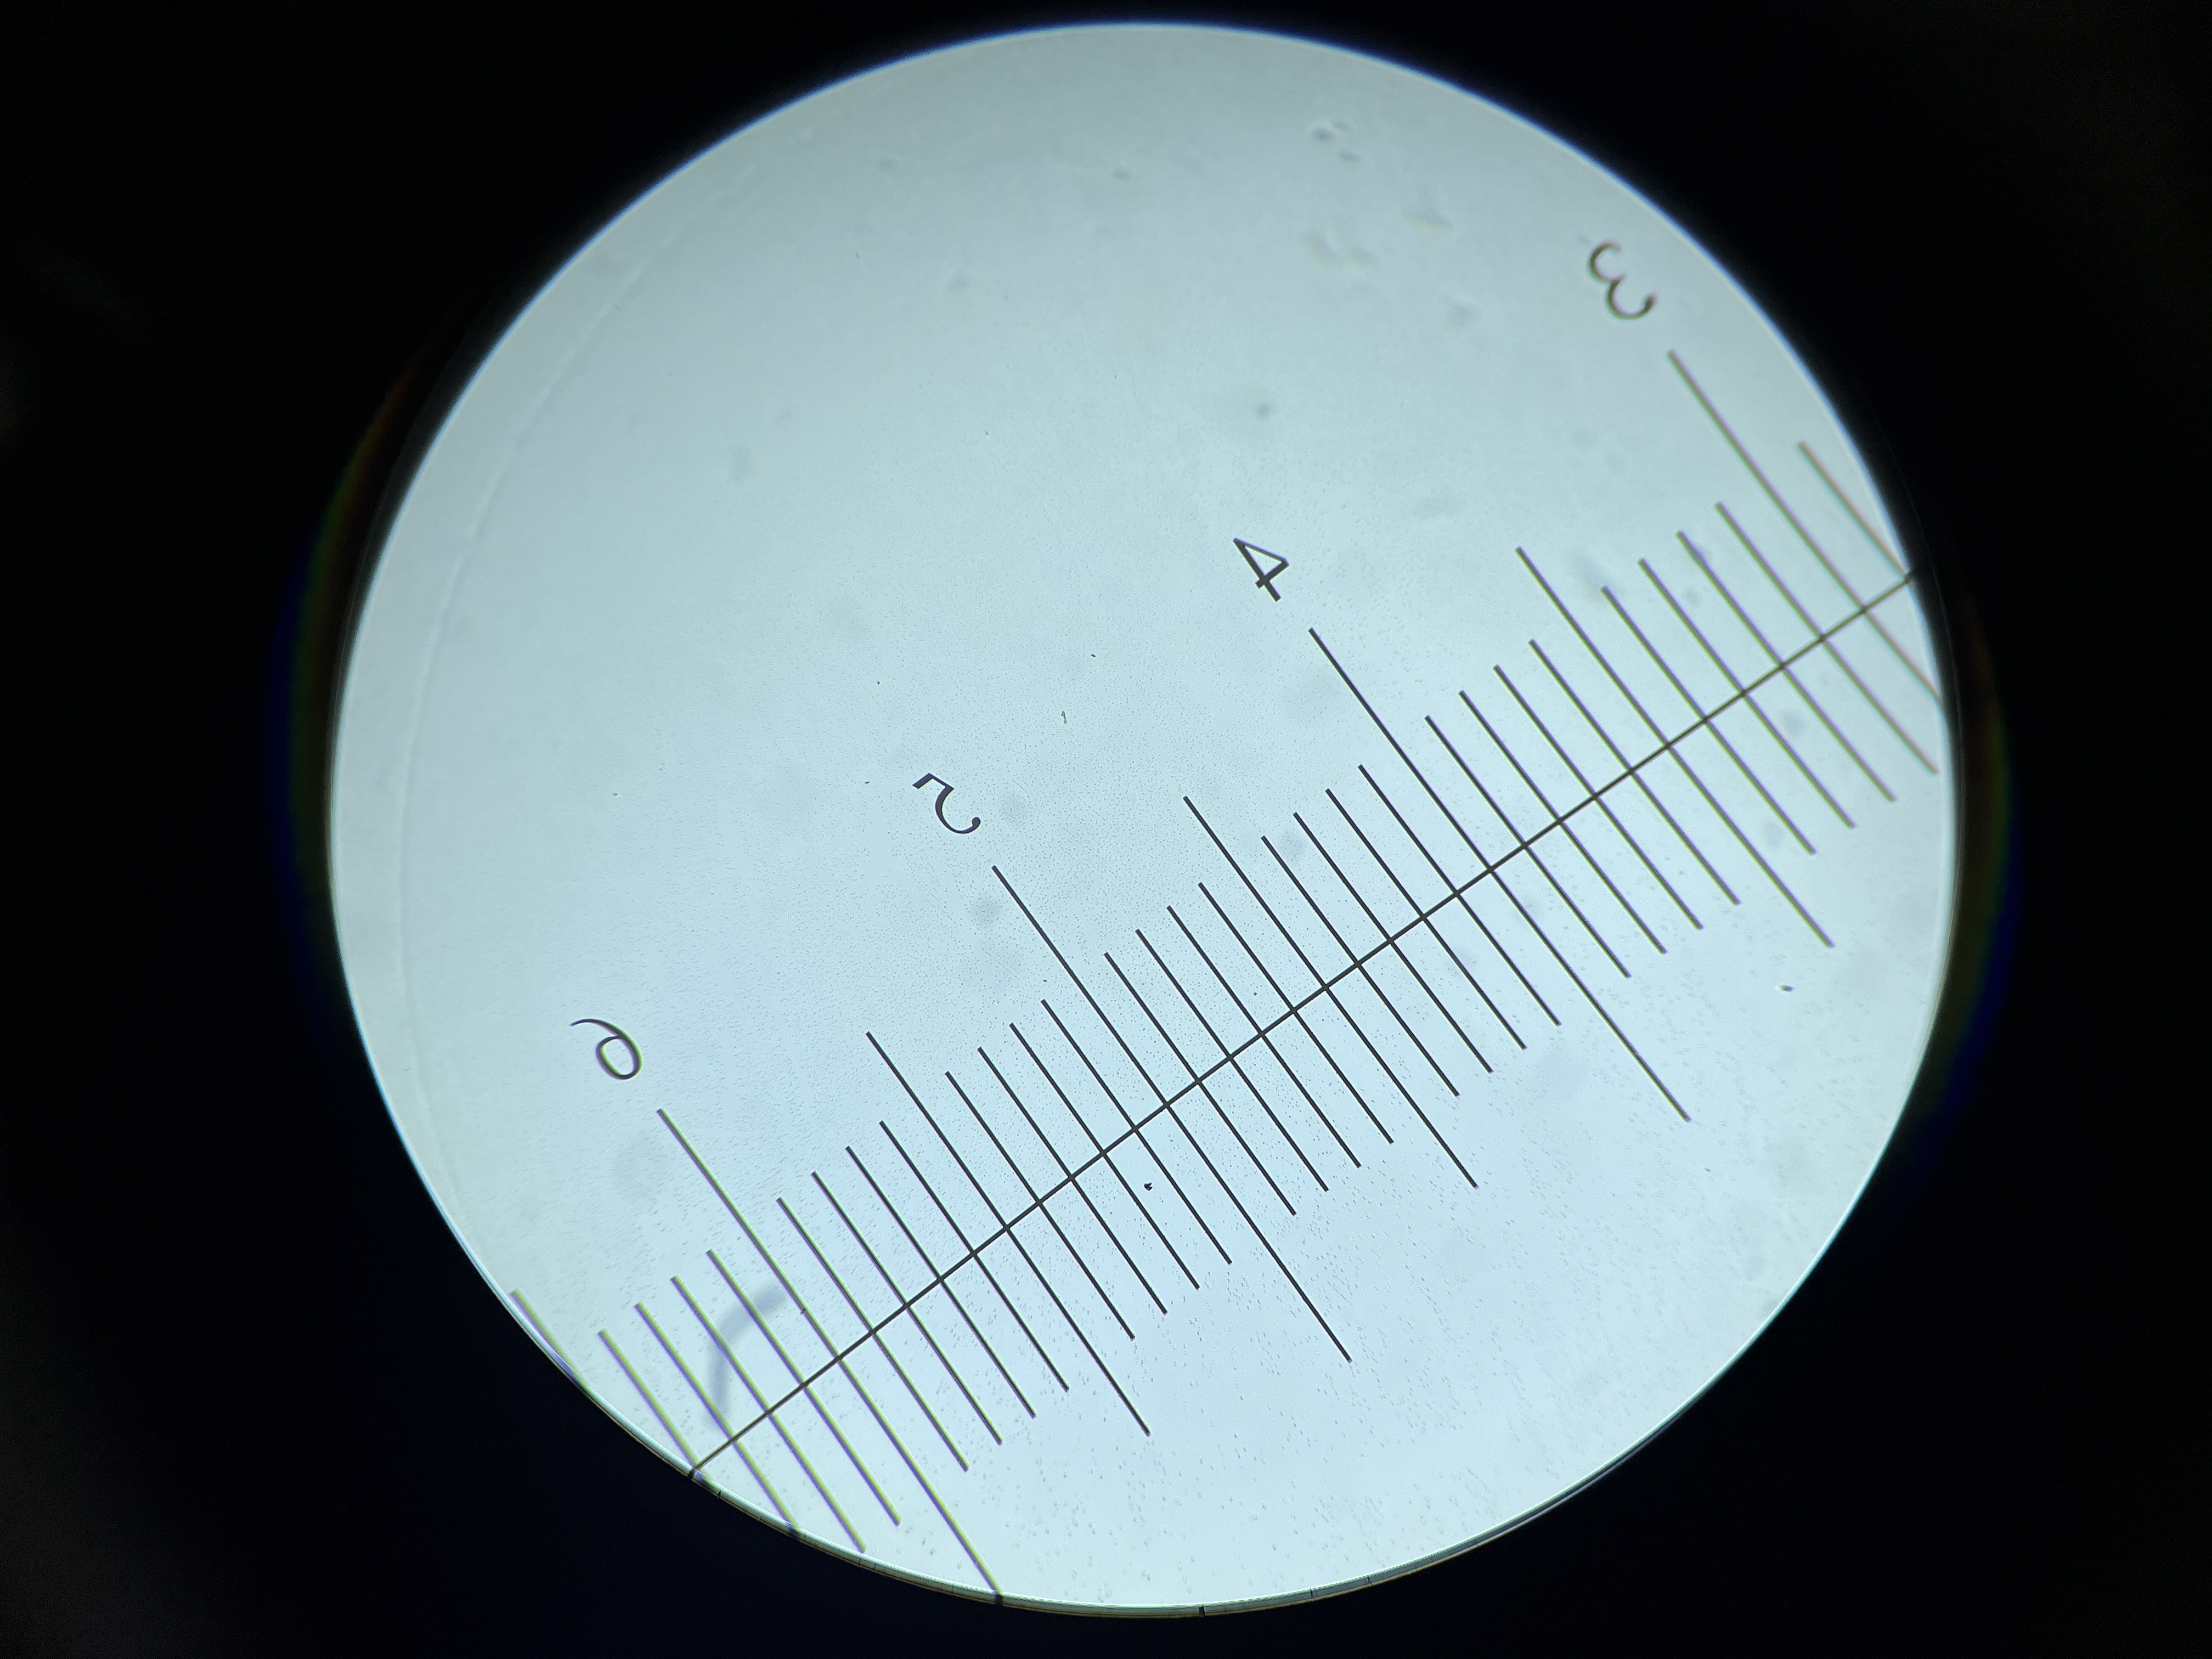 The 0.1 mm scale through the 4× objective.
Step 2 — Count pixels per division
Open the photo, zoom in, and measure how many pixels one division (0.1 mm = 100 µm) covers. Most gallery apps show pixel coordinates when you crop; or transfer the image to a computer.
Example: one division spans 250 px → every pixel corresponds to 0.4 µm in the sample plane.
Step 3 — Use it
From now on every photo from this unchanged setup can be measured:
Measure an onion cell, a hair, a printed halftone dot. A human hair should come out at 50–100 µm — if it doesn't, something changed (zoom, eyepiece distance, different build).
Measuring the optical magnification itself (Sek II)
If you know your phone's physical pixel pitch (look up the sensor; typically 1.0–1.6 µm, mind pixel binning!), the total magnification of the optics is
Compare this measured with the predicted objective × eyepiece value — the discrepancies (phone lens, eyepiece distance) are worth a classroom discussion.
Rules that keep the calibration valid
- No digital zoom between calibration and measurement (or calibrate at that zoom).
- Don't move the phone relative to the eyepiece.
- Re-calibrate after every rebuild or objective change (4× vs. anything else).
Related
- Your first microscope
- Parts and parameters — magnification formulas in one place